How to Login to 192.168.1.1?
The IP address 192.168.1.1 is commonly used as the default gateway for many home broadband routers. It serves as an access point to the router’s administration panel, allowing users to configure and manage various settings related to their internet connection and network. Here’s some information about 192.168.1.1 admin login:
To log in to the router using the IP address 192.168.1.1, you can follow these general steps:
- Connect to the Router’s Network: Ensure that your device (computer, laptop, or smartphone) is connected to the same network as the router. This is usually done wirelessly or through an Ethernet cable.
- Open a Web Browser: Open a web browser on your device. Common browsers include Google Chrome, Mozilla Firefox, Microsoft Edge, or Safari.
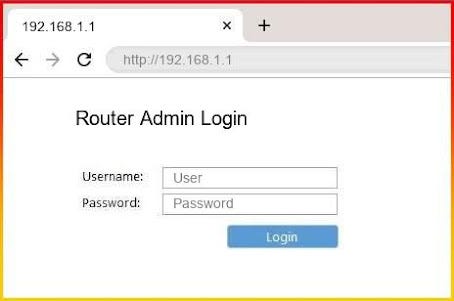
- Enter the IP Address: In the address bar of the web browser, type http://192.168.1.1 and press Enter. Make sure you don’t include “www” before the IP address.
- Enter Login Credentials: You will be prompted to enter the router’s login credentials. By default, these are often set to:
- Username: admin
- Password: admin or password
- Access the Router’s Admin Panel: After entering the correct login credentials, you should gain access to the router’s administration panel. Here, you can configure various settings related to your network, such as wireless settings, security options, and more.
- Configure Router Settings: Once logged in, you can navigate through the settings and configure them according to your preferences. This may include setting up wireless security, changing the network name (SSID), updating firmware, and managing connected devices.
- Logout: After making changes, it’s a good practice to log out of the router’s admin panel, especially if you are using a shared or public computer.
If you are unable to access http://192.168.1.1, there are a few things you can check:
- Connection: Ensure that your device is properly connected to the router’s network.
- IP Address: Confirm that you are entering the correct IP address (192.168.1.1) in the browser’s address bar.
- Browser Cache: Clear your browser cache and try accessing the IP address again.
- Default Credentials: If you’ve changed the login credentials and forgot them, you may need to perform a factory reset on the router (note that this will erase all custom settings).
Keep in mind that the specific steps and default credentials may vary depending on the router brand and model. Refer to the router’s manual or documentation for detailed instructions.
How to Change Router IP Address?
Changing the IP address of your router involves accessing the router’s administrative interface and modifying the network settings. Here are general steps you can follow, but keep in mind that the exact steps may vary depending on your router’s make and model:
- Access the Router’s Admin Panel:
- Open a web browser on a device connected to the router’s network.
- Enter the current router IP address (e.g., http://192.168.1.1) into the address bar and press Enter.
- Log in using your router’s administrator credentials.
- Locate the LAN or Network Settings:
- Once logged in, look for a section related to LAN settings, Network Configuration, or similar. The exact wording may differ based on your router.
- Change the IP Address:
- Within the LAN settings, locate the current IP address of the router. It’s usually labeled as “Router IP Address” or similar.
- Change the IP address to your desired new value. Ensure that the new IP address is within a valid private IP address range. Common private IP address ranges include 192.168.x.x, 10.x.x.x, and 172.16.x.x to 172.31.x.x.
- Save Changes:
- After entering the new IP address, find and click on a “Save” or “Apply” button to save the changes.
- Reconnect to the Router:
- After changing the IP address, your device may lose connectivity briefly. Reconnect to the router using the new IP address you’ve set.
- Verify Changes:
- Open a new web browser window and enter the new IP address into the address bar to confirm that you can access the router’s admin panel with the updated IP.
- Update DHCP Settings (Optional):
- If your router acts as a DHCP server, you may need to adjust the DHCP settings to match the new IP address. Update the DHCP range and lease settings accordingly.
- Reboot the Router (Optional):
- To ensure that all changes take effect, you may choose to reboot the router. This step is optional in many cases.
Remember that changing the router’s IP address may temporarily interrupt network connectivity, so it’s advisable to perform these changes during a time when network downtime is acceptable.
If you’re uncertain about the specific steps for your router model, consult the router’s manual or visit the manufacturer’s website for detailed instructions.
